TipCalc Xamarin.Forms
EditWe started with the goal of creating an app to help calculate what tip to leave in a restaurant
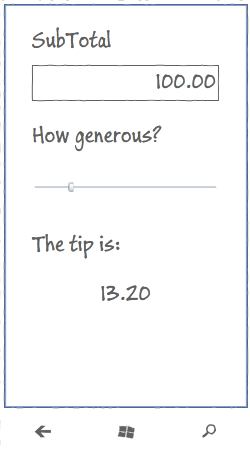
We had a plan to produce a UI based on this concept:
To satisfy this we built a ‘Core’ .NET Standard project which contained:
- Our ‘business logic’ -
ICalculationService - Our ViewModel -
TipViewModel - Our
App- which contains some bootstrapping code.
We then added User Interfaces for Xamarin.Android, Xamarin.iOS, UWP, and WPF.
For our next project, let’s shift the approach of the app from Xamarin traditional to Xamarin.Forms!
Our Xamarin.Forms app will support iOS and Android for now.
Create a new .NET Standard 2 library project
Using Visual Studio, create a new .NET Standard 2 Library project using the File |
New Project wizard. |
This project will host all the common UI files (xaml) for our Xamarin.Forms app.
Call this project TipCalc.Forms.UI.
Install MvvmCross.Forms and Xamarin.Forms packages
Open the Nuget Package Manager and search for the packages MvvmCross.Forms.
If you don’t really enjoy the NuGet UI experience, then you can alternatively open the Package Manager Console, and type:
Install-Package MvvmCross.Forms
Installing that package should also install Xamarin.Forms and MvvmCross packages to your project.
Add a reference to TipCalc.Core project
One of the main advantages of using MvvmCross with Xamarin is the flexibility it gives you in terms of approaches. You can start small with Xamarin.Forms, and when your app becomes big and complex enough, you can migrate to Xamarin traditional reusing 100% of your Core layer.
Add a reference to your TipCalc.Core project - the project we created in the first step.
Add a FormsApp.xaml class
Add a ‘Forms ContentPage Xaml’ file to the root of your TipCalc.Forms.UI project named FormsApp. This will add two files:
FormsApp.xamlFormsApp.xaml.cs
Xamarin.Forms requests you to define an App class to initialize correctly. We won’t go deeper into the details, for now let’s assume it is a necessary class, which also provides some callbacks for the different states of your app.
Edit FormsApp.xaml
Replace the content of the file with the following lines of code:
<?xml version="1.0" encoding="utf-8"?>
<Application xmlns="http://xamarin.com/schemas/2014/forms"
    xmlns:x="http://schemas.microsoft.com/winfx/2009/xaml"
    x:Class="TipCalc.Forms.UI.FormsApp">
    <Application.Resources>
    </Application.Resources>
</Application>
Edit FormsApp.xaml.cs
Replace the content of the file with the following code:
using Xamarin.Forms;

namespace TipCalc.Forms.UI
{
    public partial class FormsApp : Application
    {
        public FormsApp()
        {
            InitializeComponent();
        }
    }
}
Add your View
Create a folder named Pages on the root of the project.
Within this folder, add a new ‘Forms Content Page Xaml’ file and call it TipView.
This will generate:
TipView.xamlTipView.xaml.cs
Turn TipView into the MvvmCross View for TipViewModel
Open the TipView.xaml.cs file and change the class to inherit from MvxContentPage<TipViewModel>:
public partial class TipView : MvxContentPage<TipViewModel>
Altogether this looks like:
using MvvmCross.Forms.Views;
using TipCalc.Core.ViewModels;

namespace TipCalc.Forms.UI.Pages
{
    public partial class TipView : MvxContentPage<TipViewModel>
    {
        public TipView()
        {
            InitializeComponent();
        }
    }
}
Edit the XAML layout
Double click on the XAML file to edit it’s code.
Same as we did for other platforms, we won’t go into much depth at all here about how to use XAML. We will only highlight some parts of the code which are important to MvvmCross.
Change the root node from:
<ContentPage xmlns="http://xamarin.com/schemas/2014/forms"
             xmlns:x="http://schemas.microsoft.com/winfx/2009/xaml"
             x:Class="TipCalc.Forms.UI.Pages.TipView">
         ...
</ContentPage>
To:
<views:MvxContentPage x:TypeArguments="viewModels:TipViewModel"
    xmlns="http://xamarin.com/schemas/2014/forms"
    xmlns:x="http://schemas.microsoft.com/winfx/2009/xaml"
    xmlns:views="clr-namespace:MvvmCross.Forms.Views;assembly=MvvmCross.Forms"
    xmlns:mvx="clr-namespace:MvvmCross.Forms.Bindings;assembly=MvvmCross.Forms"
    xmlns:viewModels="clr-namespace:TipCalc.Core.ViewModels;assembly=TipCalc.Core"
    x:Class="TipCalc.Forms.UI.Pages.TipView">
        ...
</views:MvxContentPage>
This makes your View use the MvvmCross base class. And we have also added some namespaces for views, mvx and viewmodels.
We are now ready to start adding content to our page!
We will start by adding a StackLayout:
<views:MvxContentPage ...>
        <ContentPage.Content>
            <StackLayout Margin="10">

            </StackLayout>
        </ContentPage.Content>
</views:MvxContentPage>
And then we just need to add:
- A
Labelwhich text should beSubTotaland anEntrynamedSubTotalEntry, for editing the value - A
Labelwhich text should beGenerosityand aSlidernamedGenerositySlider, for editing the “generosity” - A
Labelwhich text should beTip to leaveand aLabelnamedTipLabel,for showing theTipresult
This will produce the following XAML:
<?xml version="1.0" encoding="UTF-8"?>
<views:MvxContentPage x:TypeArguments="viewModels:TipViewModel"
    xmlns="http://xamarin.com/schemas/2014/forms"
    xmlns:x="http://schemas.microsoft.com/winfx/2009/xaml"
    xmlns:views="clr-namespace:MvvmCross.Forms.Views;assembly=MvvmCross.Forms"
    xmlns:mvx="clr-namespace:MvvmCross.Forms.Bindings;assembly=MvvmCross.Forms"
    xmlns:viewModels="clr-namespace:TipCalc.Core.ViewModels;assembly=TipCalc.Core"
    x:Class="TipCalc.Forms.UI.Pages.TipView">
    <ContentPage.Content>
            <StackLayout Margin="10">
                <Label Text="Subtotal" />
                <Entry x:Name="SubTotalEntry"
                       mvx:Bi.nd="Text SubTotal, Mode=TwoWay"/>
                <Label Text="Generosity" />
                <Slider x:Name="GenerositySlider"
                        Maximum="100"
                        mvx:Bi.nd="Value Generosity, Mode=TwoWay"/>
                <Label Text="Tip to leave" />
                <Label x:Name="TipLabel"
                       mvx:Bi.nd="Text Tip"/>
            </StackLayout>
    </ContentPage.Content>
</views:MvxContentPage>
In the above code, we are using the MvvmCross data-binding engine in XAML directly.
On each of the mvx:Bi.nd calls:
- The first element corresponds to a View property, or in the MvvmCross context, the ‘binding target’.
- The second element corresponds to a ViewModel property, or in the MvvmCross context, the ‘binding source’.
- By default most bindings are
OneWay, so in order to make our View work as we want to, we are defining a different binding mode.
Although this sample only shows simple bindings, the infrastructure built within MvvmCross is really powerful! Our data-binding engine supports ValueConverters, ValueCombiners, FallbackValues, different modes of bindings and a super straight forward mechanism to add your own custom bindings.
The Xamarin.Forms UI is complete!
At this point we have finished working on the shared code parts of our app. We will now add an Android and an iOS projects to our solution.
Add a Xamarin.Android project
Xamarin typically provides you with very nice and easy to use templates for creating cross-platform Xamarin.Forms apps. But in this case, we will add a blank application and do all the steps by ourselves.
Add a new project to your solution - a ‘Blank App (Android)’ application with name TipCalc.Forms.Droid
Install MvvmCross.Forms package
Open the Nuget Package Manager and search for the package MvvmCross.Forms.
If you don’t really enjoy the NuGet UI experience, then you can alternatively open the Package Manager Console, and type:
Install-Package MvvmCross.Forms
Installing this package will also install Xamarin.Forms, MvvmCross and a few Android.Support packages (so it may take a while).
Add references to TipCalc.Core and TipCalc.Forms.UI
Add a reference to both TipCalc.Core and TipCalc.Forms.UI projects.
Delete Resources/Layout/Main.axml
We won’t use that file in any case.
Add Tabbar and Toolbar layouts:
Add an axml file called Tabbar.axml within the Resources/Layout folder:
<?xml version="1.0" encoding="utf-8"?>
<com.google.android.material.tabs.TabLayout
    xmlns:android="http://schemas.android.com/apk/res/android"
    xmlns:app="http://schemas.android.com/apk/res-auto"
    android:id="@+id/sliding_tabs"
    android:layout_width="match_parent"
    android:layout_height="wrap_content"
    android:background="?attr/colorPrimary"
    android:theme="@style/ThemeOverlay.AppCompat.Dark.ActionBar"
    app:tabIndicatorColor="@android:color/white"
    app:tabGravity="fill"
    app:tabMode="fixed" />
Now do the same with an axml file called Toolbar.axml:
<?xml version="1.0" encoding="utf-8"?>
<androidx.appcompat.widget.Toolbar xmlns:android="http://schemas.android.com/apk/res/android"
    android:id="@+id/toolbar"
    android:layout_width="match_parent"
    android:layout_height="wrap_content"
    android:background="?attr/colorPrimary"
    android:theme="@style/ThemeOverlay.AppCompat.Dark.ActionBar"
    android:popupTheme="@style/ThemeOverlay.AppCompat.Light" />
Add a default style for your Android app:
If it doesn’t exist, add a folder named values inside the Resources folder.
Within that folder, add a file named styles.xml and add this content to it:
<?xml version="1.0" encoding="UTF-8"?>
<resources>
    <style name="MyTheme"
           parent="MyTheme.Base">
    </style>
    <!-- Base theme applied no matter what API -->
    <style name="MyTheme.Base"
           parent="Theme.AppCompat.Light.DarkActionBar">
        <!--If you are using revision 22.1 please use just windowNoTitle. Without android:-->
        <item name="windowNoTitle">true</item>
        <!--We will be using the toolbar so no need to show ActionBar-->
        <item name="windowActionBar">false</item>
        <!-- Set theme colors from http://www.google.com/design/spec/style/color.html#color-color-palette-->
        <!-- colorPrimary is used for the default action bar background -->
        <item name="colorPrimary">#2196F3</item>
        <!-- colorPrimaryDark is used for the status bar -->
        <item name="colorPrimaryDark">#1976D2</item>
        <!-- colorAccent is used as the default value for colorControlActivated
         which is used to tint widgets -->
        <item name="colorAccent">#FF4081</item>
        <!-- You can also set colorControlNormal, colorControlActivated
         colorControlHighlight and colorSwitchThumbNormal. -->
        <item name="windowActionModeOverlay">true</item>
        <item name="android:datePickerDialogTheme">@style/AppCompatDialogStyle</item>
    </style>
    <style name="AppCompatDialogStyle"
           parent="Theme.AppCompat.Light.Dialog">
        <item name="colorAccent">#FF4081</item>
    </style>
</resources>
It will be the Android Theme we will use for the app. You can also customize some values in there.
Edit MainActivity.cs
As our app uses Xamarin.Forms, we don’t need to add any piece of UI to our Android project, but we do need to hook up some code to perform the framework initialization.
First of all, change the inheritance of MainActivity to be:
public class MainActivity : MvxFormsAppCompatActivity<MvxFormsAndroidSetup<App, FormsApp>, App, FormsApp>
Here we are letting MvvmCross know that:
- We want to use the default provided
Setup - Our Core application class is
App - Our Xamarin.Forms application class is
FormsApp
Now override the method OnCreate(Bundle bundle) and let Xamarin.Forms know which are the Resource IDs of the tabbar & toolbar we want to use (before calling base):
protected override void OnCreate(Bundle bundle)
{
    TabLayoutResource = Resource.Layout.Tabbar;
    ToolbarResource = Resource.Layout.Toolbar;
    base.OnCreate(bundle);
}
We are almost there! The only missing piece is the ActivityAttribute which Xamarin uses to fill the AndroidManifest file.
This is what the MainActivity class should look like in the end:
using Android.App;
using Android.Content.PM;
using Android.OS;
using MvvmCross.Forms.Platforms.Android.Core;
using MvvmCross.Forms.Platforms.Android.Views;
using TipCalc.Core;
using TipCalc.Forms.UI;

namespace TipCalc.Forms.Droid
{
    [Activity(
        Label = "TipCalc.Forms.Droid",
        Icon = "@drawable/icon",
        Theme = "@style/MyTheme",
        MainLauncher = true,
        ConfigurationChanges = ConfigChanges.ScreenSize | ConfigChanges.Orientation,
        LaunchMode = LaunchMode.SingleTask)]
    public class MainActivity : MvxFormsAppCompatActivity<MvxFormsAndroidSetup<App, FormsApp>, App, FormsApp>
    {
        protected override void OnCreate(Bundle bundle)
        {
            TabLayoutResource = Resource.Layout.Tabbar;
            ToolbarResource = Resource.Layout.Toolbar;
            base.OnCreate(bundle);
        }
    }
}
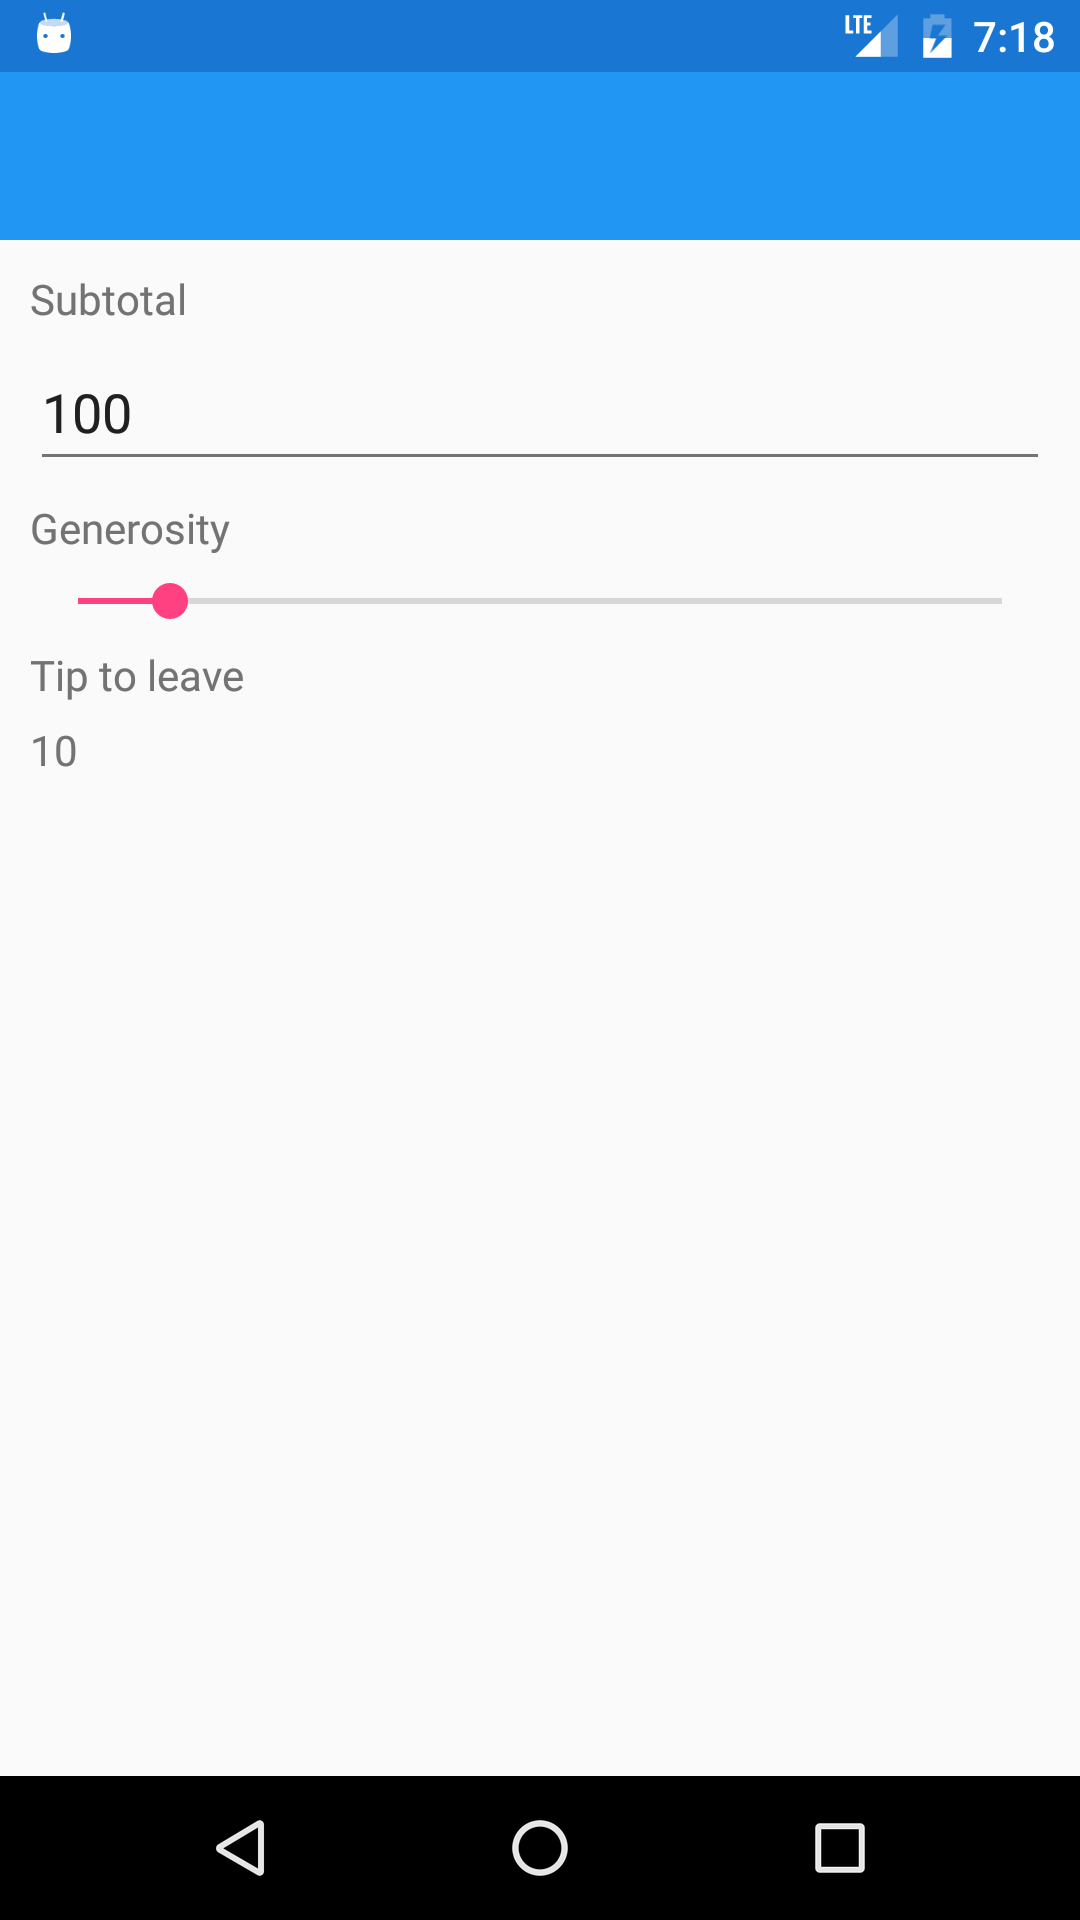
At this point you should be able to set the TipCalc.Forms.Droid as the startup project and finally give the app a run! This is what you should see:
Add a Xamarin.iOS project
Xamarin typically provides you with very nice and easy to use templates for creating cross-platform Xamarin.Forms apps. But in this case, same as we did with Android, we will add a blank application and do all the steps by ourselves.
Add a new project to your solution - a ‘Blank App (iOS)’ application with name TipCalc.Forms.iOS
Install MvvmCross.Forms package
Open the Nuget Package Manager and search for the package MvvmCross.Forms.
If you don’t really enjoy the NuGet UI experience, then you can alternatively open the Package Manager Console, and type:
Install-Package MvvmCross.Forms
Installing this package will also install Xamarin.Forms and the MvvmCross package.
Add references to TipCalc.Core and TipCalc.Forms.UI
Add a reference to both TipCalc.Core and TipCalc.Forms.UI projects.
Delete ViewController.cs and Main.storyboard
Because we will add our own view.
After you have deleted those, open the Info.plist file and under the ‘Deployment Info’ section, remove the text in the ‘Main Interface’ input (leave it blank).
Edit AppDelegate.cs
As our app uses Xamarin.Forms, we don’t need to add any piece of UI to our iOS project, but we do need to hook up some code to perform the framework initialization.
The AppDelegate class plays a very important role on iOS apps, as it provides a set of callback that the OS uses to inform you about events in your application’s lifecycle.
First of all, change the inheritance of AppDelegate to be:
public partial class AppDelegate : MvxFormsApplicationDelegate<MvxFormsIosSetup<App, FormsApp>, App, FormsApp>
Here we are letting MvvmCross know that:
- We want to use the default provided
Setup - Our Core application class is
App - Our Xamarin.Forms application class is
FormsApp
This is what the AppDelegate class should look like in the end:
using Foundation;
using MvvmCross.Forms.Platforms.Ios.Core;
using TipCalc.Core;
using TipCalc.Forms.UI;
using UIKit;

namespace TipCalc.Forms.iOS
{
    [Register(nameof(AppDelegate))]
    public partial class AppDelegate : MvxFormsApplicationDelegate<MvxFormsIosSetup<App, FormsApp>, App, FormsApp>
    {
        public override bool FinishedLaunching(UIApplication uiApplication, NSDictionary launchOptions)
        {
            return base.FinishedLaunching(uiApplication, launchOptions);
        }
    }
}
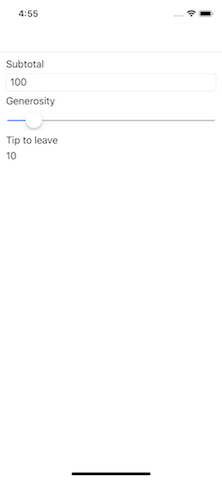
At this point you should be able to set the TipCalc.Forms.iOS as the startup project and finally give the app a run! This is what you should see:
Add a Xamarin.UWP project
Xamarin typically provides you with very nice and easy to use templates for creating cross-platform Xamarin.Forms apps. But in this case, same as we did with Android and iOS, we will add a blank application and do all the steps by ourselves.
Add a new project to your solution - a ‘Blank App (UWP)’ application with name TipCalc.Forms.UWP. Set it’s minimum version to Windows 10 Fall Creators Update as that is the minimum version which supports .NET Standard 2.0.
Install MvvmCross.Forms package
Open the Nuget Package Manager and search for the package MvvmCross.Forms.
If you don’t really enjoy the NuGet UI experience, then you can alternatively open the Package Manager Console, and type:
Install-Package MvvmCross.Forms
Installing this package will also install Xamarin.Forms and the MvvmCross package.
Add references to TipCalc.Core and TipCalc.Forms.UI
Add a reference to both TipCalc.Core and TipCalc.Forms.UI projects.
Delete MainPage.xaml
Because we will add our own view.
Edit App.xaml.cs
The App class plays a very important role on UWP apps, as it provides a set of callback that the OS uses to inform you about events in your application’s lifecycle. We won’t dig further into it’s responsibilities, but you may want to read about it in the official documentation for the platform.
Open the App.xaml.cs and delete all the class content. Leave only the default constructor in place:
public sealed partial class App
{
    public App()
    {
        InitializeComponent();
    }
}
On the same file add another class, which will contain the necessary information to get MvvmCross up and running:
public abstract class TipCalcApp : MvxWindowsApplication<MvxFormsWindowsSetup<App, FormsApp>, App, FormsApp>
{
}
Here we are letting MvvmCross know that:
- We want to use the default provided
Setup - Our Core application class is
App - Our Xamarin.Forms application class is
FormsApp
Edit App.xaml
We will use the TipCalcApp class in Xaml. Open the file and replace all the content for this code:
<local:TipCalcApp x:Class="TipCalc.Forms.UWP.App"
    xmlns="http://schemas.microsoft.com/winfx/2006/xaml/presentation"
    xmlns:x="http://schemas.microsoft.com/winfx/2006/xaml"
    xmlns:local="using:TipCalc.Forms.UWP"
    RequestedTheme="Light">

</local:TipCalcApp>
What this code snippet does, is to set the App base class type to TipCalcApp.
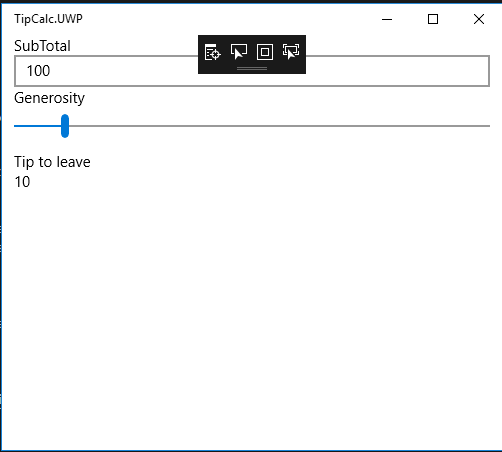
At this point you should be able to set the TipCalc.Forms.UWP as the startup project and finally give the app a run! This is what you should see:
Add a WPF project
Xamarin typically provides you with very nice and easy to use templates for creating cross-platform Xamarin.Forms apps. But in this case, same as we did with Android and iOS, we will add a blank application and do all the steps by ourselves.
Add a new project to your solution - a ‘WPF App (.NET Framework)’ named TipCalc.Forms.WPF.
Install MvvmCross.Forms package
Open the Nuget Package Manager and search for the package MvvmCross.Forms.
If you don’t really enjoy the NuGet UI experience, then you can alternatively open the Package Manager Console, and type:
Install-Package MvvmCross.Forms
Installing this package will also install Xamarin.Forms and the MvvmCross package.
Keep(!) MainWindow.xaml
We need MainWindow for this app
Install MvvmCross.Platforms.Wpf
Same as you did with the MvvmCross package, install the specific one for Wpf.
Add references to TipCalc.Core and TipCalc.Forms.UI
Add a reference to both TipCalc.Core and TipCalc.Forms.UI projects.
Edit App.xaml.cs
WPF will be an easy addition if you have followed the article for UWP. On this platform, the App class also plays a very important role, as it provides a set of callback that the OS uses to inform you about events in your application’s lifecycle. We won’t dig further into it’s responsibilities, but you may want to read about it in the official documentation.
Open the App.xaml.cs and delete all the class content. Leave only the default class and make it extend MvxApplication:
public partial class App : MvxApplication
Now override the method RegisterSetup and use the object extension method RegisterSetupType:
protected override void RegisterSetup()
{
    this.RegisterSetupType<MvxFormsWpfSetup<Core.App, FormsApp>>();
}
Here we are letting MvvmCross know that:
- We want to use the default provided
Setup - Our Core application class is
App - Our Xamarin.Forms application class is
FormsApp
Edit App.xaml
Now it’s time to edit the xaml part of our WPF App class. Open the file and replace all the content for this code:
<views:MvxApplication
    xmlns:views="clr-namespace:MvvmCross.Platforms.Wpf.Views;assembly=MvvmCross.Platforms.Wpf"
    x:Class="TipCalc.Forms.WPF.App"
    xmlns="http://schemas.microsoft.com/winfx/2006/xaml/presentation"
    xmlns:x="http://schemas.microsoft.com/winfx/2006/xaml"
    StartupUri="MainWindow.xaml">
</views:MvxApplication>
Edit the MainWindow.xaml.cs
Open up MainWindow.xaml.cs and change the base class to MvxFormsWindowsPage:
using System.Windows;
using MvvmCross.Platforms.Wpf.Views;

namespace TipCalc.Forms.WPF
{
    /// <summary>
    /// Interaction logic for MainWindow.xaml
    /// </summary>
    public partial class MainWindow : MvxFormsWindowsPage
    {
        public MainWindow()
        {
            InitializeComponent();
        }
    }
}
Edit the MainWindow.xaml
Now open the XAML document and replace all the content for this code:
<views:MvxFormsWindowsPage
        x:Class="TipCalc.Forms.WPF.MainWindow"
        xmlns:views="clr-namespace:MvvmCross.Forms.Platforms.Wpf.Views;assembly=MvvmCross.Forms.Platforms.Wpf"
        xmlns="http://schemas.microsoft.com/winfx/2006/xaml/presentation"
        xmlns:x="http://schemas.microsoft.com/winfx/2006/xaml"
        xmlns:d="http://schemas.microsoft.com/expression/blend/2008"
        xmlns:mc="http://schemas.openxmlformats.org/markup-compatibility/2006"
        xmlns:local="clr-namespace:TipCalc.Forms.WPF"
        mc:Ignorable="d"
        Title="MainWindow" Height="450" Width="800">
    <Grid>
    </Grid>
</views:MvxFormsWindowsPage>
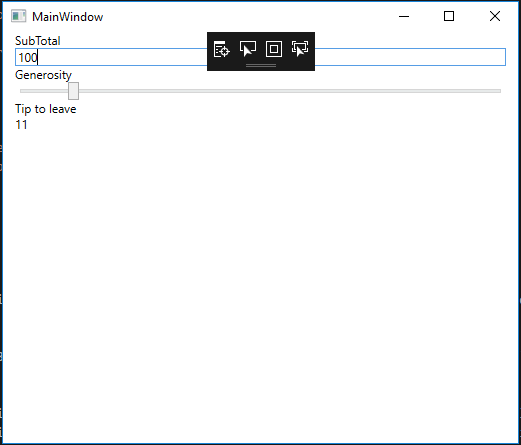
At this point you should be able to set the TipCalc.Forms.WPF as the startup project and finally give the app a run! This is what you should see:
Moving on…
There’s more we could do to make the Forms User Interface nicer and to make the app richer… but for this first application, we will leave it here for now.
Of course you can go ahead and add some more platforms to the Xamarin.Forms version of TipCalc (UWP, macOS).
For now we will stop here and review some more key concepts like navigation.